Tongue and Groove Ceiling: What it is, plus how to install it
We’re big fans of ceiling design over here, adding stained wood and tongue and groove to a few of our spaces.
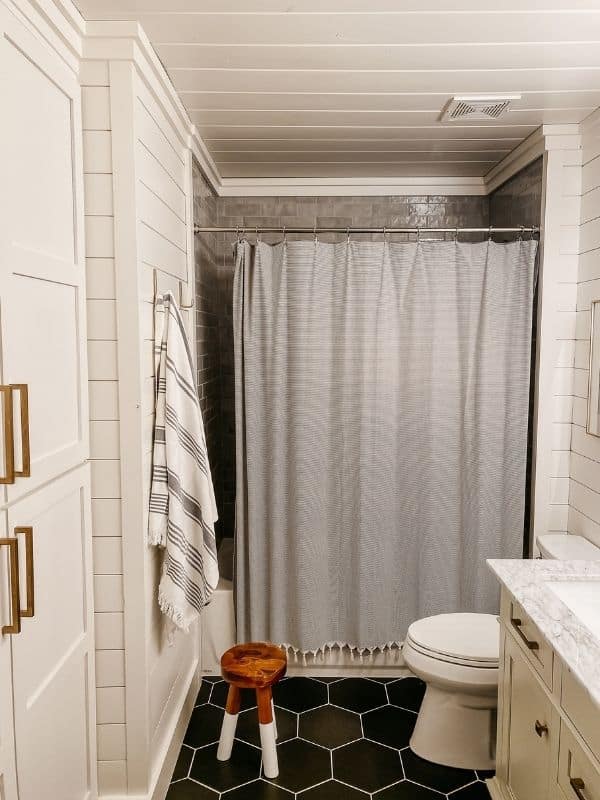
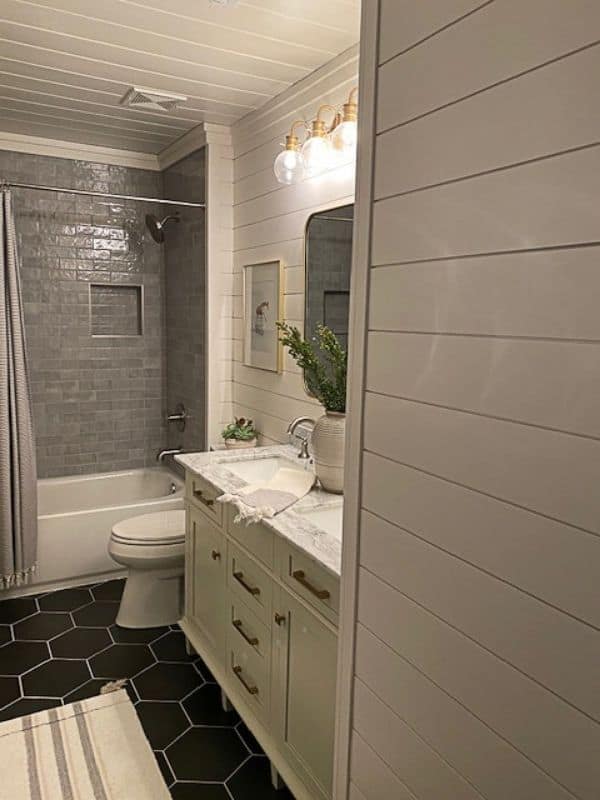
Recently, we revealed our bathroom/laundry room makeover where we used tongue and groove ceiling and have received many questions about it.
If you’re thinking about adding visual interest to your ceiling here’s everything you need to know!
What is a tongue and groove ceiling?
Tongue and Groove is a type of wood millwork product designed so that one side of a piece of wood can slip inside the opposite side of another piece of wood like a puzzle.
Just like most hardwood floors, tongue and groove boards have a “tongue” on one linear side of the board and a “groove” on the other side for another board’s tongue.
For tongue and groove boards used on ceilings, most boards will have a simple design milled into the edges of the boards creating a “V” shape when two boards are fit together.
For this reason, tongue and groove ceiling boards are often referred to as “V Joint” boards, or “V Joint Tongue and Groove.”
These boards will usually give you two options for your ceiling aesthetic. One side will appear as beadboard while the other side will appear with the V design at the seams.
How much does a tongue and groove ceiling cost?
Tongue and groove typically costs between $1.25 — $1.60 per linear foot, or around $2.50 to $3.00 per square foot.
Some wood species, like cedar, will cost you way more than yellow pine or spruce. These woods take stain much differently from one another, so material selection should be made once you’ve identified the color you’re looking for.
If you’re painting the ceiling, it matters very little which species of wood you’ll use. Certain woods will give a very rough surface while others will be extremely smooth, so this may affect your choice if you’re painting it, but any wood installed and sealed properly will last just as long as another.
Installation typically costs around $2.50 to $3.50 per square foot, depending on the difficulty of the ceiling in terms of height and complexity of the angles involved, so your material costs will be fairly close to your labor costs.
All and all tongue and groove is fairly affordable and you can also check out more low budget ceiling ideas here.
How to install a Tongue and Groove ceiling
The most common method for installing tongue and groove ceilings is with a nail gun, fastening each board to every ceiling joist with 2 nails shot into the joist at slightly opposing angles.
If you’re planning to install your own ceiling, you’ll need a few tools. Most people install tongue and groove ceilings using miter saws and nail guns, and we recommend you do the same.
You’ll also need a tape measure, a stud finder (if installing atop drywall), and a step ladder capable of getting you fairly close to your ceiling — you know, close enough that you’re not on your tippie toes on the top step holding a long awkward piece of lumber over your head while you wrestle a nail gun compressor hose into position.
Step 1: Determine which direction your ceiling joists are going
You’ll need to install your material perpendicularly so that each board intersects multiple ceiling joists for attachment.
You can also install it at an angle, but we don’t recommend exceeding a 45 degree angle as you’ll quickly find that there won’t be many opportunities to secure your wood to joists in edges and corners for many of your pieces.
For the sake of simplicity, we’ll assume you’re installing on a flat ceiling in a perpendicular direction to your ceiling joists.
Step 2: Measure and cut your boards
Measure the length your boards need to go, and cut them to around a ½” less than the width of the room.
I often actually cut it a full 1” less to make sure the boards fit easily, especially since the trim will hide the edges once the ceilings are up. Take this measurement at multiple points in the room, because there’s no such thing as a perfectly square room.
Step 3: Find the studs
Before nailing anything up, you need to know what you’re hitting. Take your stud finder and mark out the studs every 3 to 5 feet or so.
You can eyeball it with spacing this far apart to find where they are in the gaps so you don’t have to draw a line along every stud in the room.
Step 4: Install your first board
Use an 18 gauge Brad Nailer and nail up your first board, starting at one end. I prefer to have the tongue face the room as I work as it seems to be easier to push a grooved side of a board onto a tongue side.
I typically use 2” brad nails because they need to go through the wood and the drywall and still hit the joist.
If you are attaching directly to the studs, use 1 ½” to 1 ¾” nails. Shoot two nails into each joist at slightly different angles to increase holding power.
These nails should be shot through the tongue joint of the wood. These nail holes won’t be seen (perhaps the best reason to install it tongue facing out), and are the primary holding power for the boards when installed at these opposing angles.
I usually shoot one nail straight up at the back of the board and fill this hole later before staining or painting.
Step 5: Install your second board
Installing the next board takes some getting used to. I recommend getting some help from a friend if your boards are longer than 8 feet.
Simply pushing the next board onto the first board doesn’t usually work very well. You’ll need to tap in into place, and this can be impossible without some help and without cutting a small block.
Once you’ve cut your first piece, you should have some scrap. Take a piece of scrap tongue and groove and make a piece about 8 inches long.
Now cut this piece down the center so that you only have the groove side left with a flat cut edge on the opposite end. This block will help you as you try to slip your net board in.
You could simply tap the new board with a hammer, but even a slight dent in the tongue of the first board will result in a dented or compressed tongue that will make the next board that much more difficult to install.
Instead, slip this little grooved block onto the tongue and tap the block until the board slips into place.
Sometimes you have to work the board in gradually along the length of it, tapping at multiple locations a little bit at a time until the board is in. Now you can nail in up the same way you did the first board.
Step 6: Trim out the ceiling
Once you’ve finished the ceiling boards, decide what kind of trim to use. Outdoor porches often use trim as simple as 1×2 material, but the style of porch sometimes calls for full crown moulding. Either way, your tongue and groove cut ends will be hidden by this trim.
In the photos above, we used a classic farmhouse trim style.
Step 7: Finish paint or stain
Need even more inspiration? Find more cheap ceiling ideas here!


Hi there I have to start by saying I love your home and such great ideas. We are building our home and I knew I wanted white & wood!! Now I have a color or colors thanks to you. We are doing tonge & grove (pine) I really love the stain color you used in the bathroom could you let me know what that stain color was??? I love it and I couldnt find the stain color. Thanks!
Hi there,
Sorry for the delay, and thanks for the compliment. Here’s what we used:a combination of Minwax’s natural, cherry and weathered gray to achieve the look you see. The stain was 60% cherry,30% natural and 10% weathered gray all mixed together before applying.