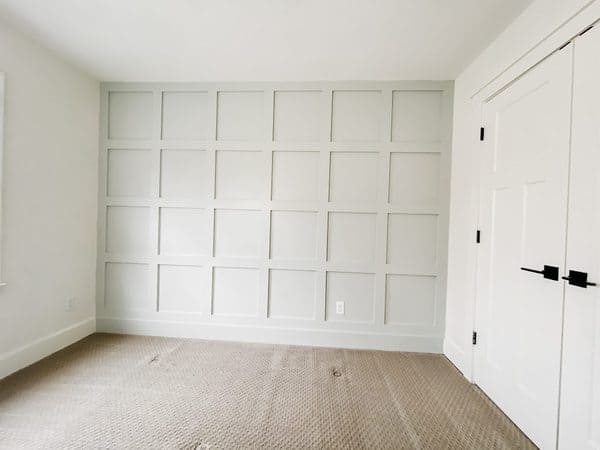
Board and batten accent wall you can totally DIY
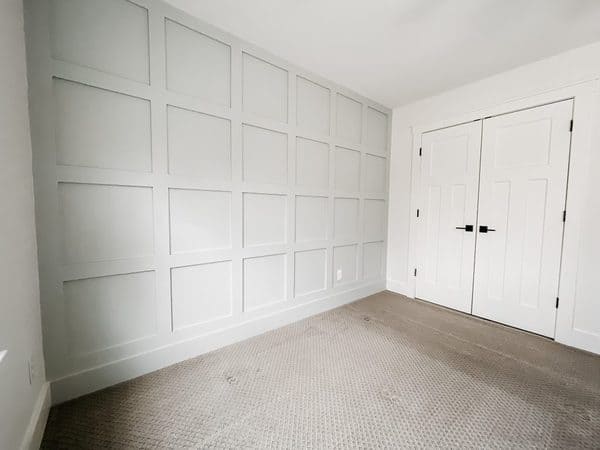
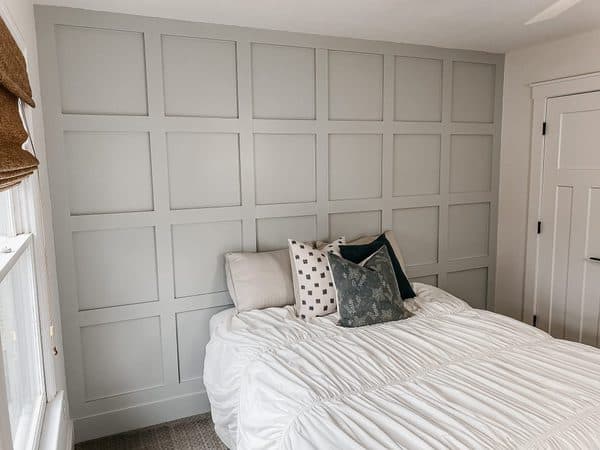
When we moved into our home, our daughter’s room was nothing special–just four walls and an outdated fan. To spruce up her space, we decided to add a board and batten accent wall, and wow, did it completely change the room!
If you have a blank wall in your home that could use some TLC why not try adding board and batten? Before we jump into the full tutorial below, we’ve answered the most common questions we get when creating the board and batten feature wall.
This post contains affiliate links. Read our policy here.
How thick should board and batten be?
If you’re dealing with a smaller bedroom in a house with 8 ft ceilings, you’ll want to use something in the 2.5” to 3.5” width range for the trim work.
If you’re installing it in a large living room with 10ft ceilings, you may want to move up to the 4.5” to 5.5” range or wood width.
You don’t want the trim to feel like it’s dominating a tiny room or swallowed up and flimsy in an expansive living space.
While this decision is largely up to your aesthetic preference, you should definitely take into consideration the scale of the room.
How is spacing for board and batten calculated?
Determining spacing for board and batten is critical for achieving a proportional aesthetic. First, measure the width of your walls and height of your ceiling. Second, draw it out on a piece of paper (to scale). I usually use the scale of 1” = 1 foot when drawing it out to keep the math simple.
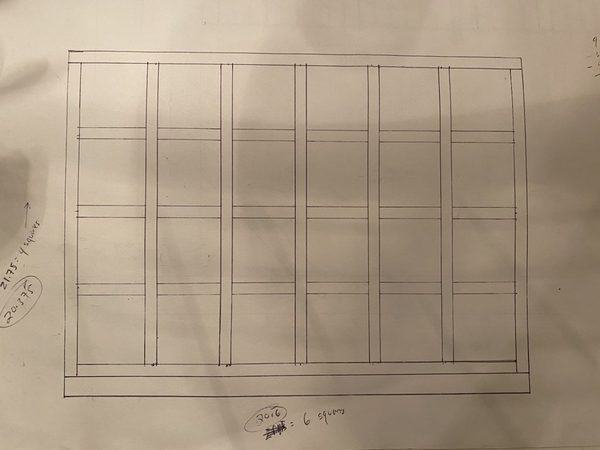
You will realize that getting perfect squares will be impossible in most circumstances simply because of the room. The most important rule I always stick to is that I will never allow my “squares” to be rectangles that are shorter than they are wide.
If I can’t achieve perfect squares, I will always work out the number of squares in a way that sets their dimensions to be rectangles in the vertical rather than the horizontal.
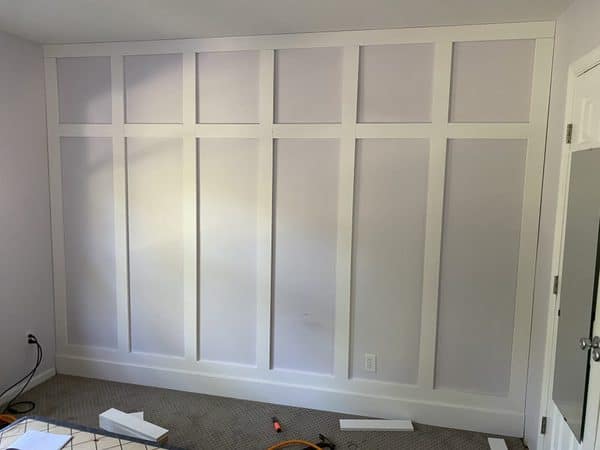
Having flat rectangles gives the subconscious impression that the room is shorter and being pressed down, while the vertical rectangles tend to make a room feel taller and more open. (Our “squares” ended up being around 21.5” inches wide x 22.75” tall… they look like squares, but they’re not!)
Supplies needed for your board and batten accent wall
- Wood pieces
- Hammer
- Crowbar/chisel
- Utility knife
- Pliers
- Drywall mud
- Sand Paper (120 Grit)
- Caulking
How to make your own Board and Batten accent wall
Step 1: Build your perimeter
Remove old trim using a utility knife to score the old caulking lines. If you don’t do this, you’ll end up pulling large sections of the drywall paper surface up with your molding that will require repairs later.
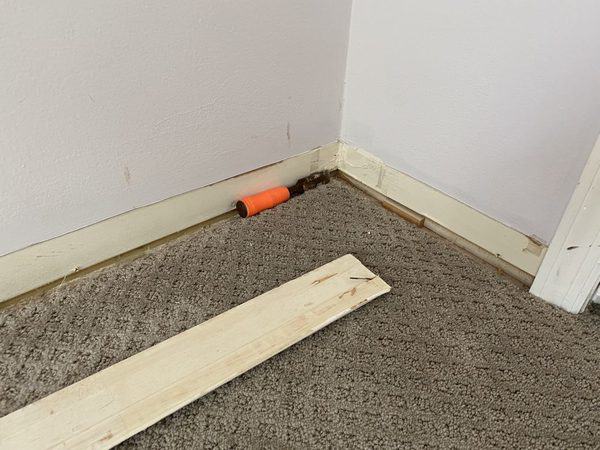
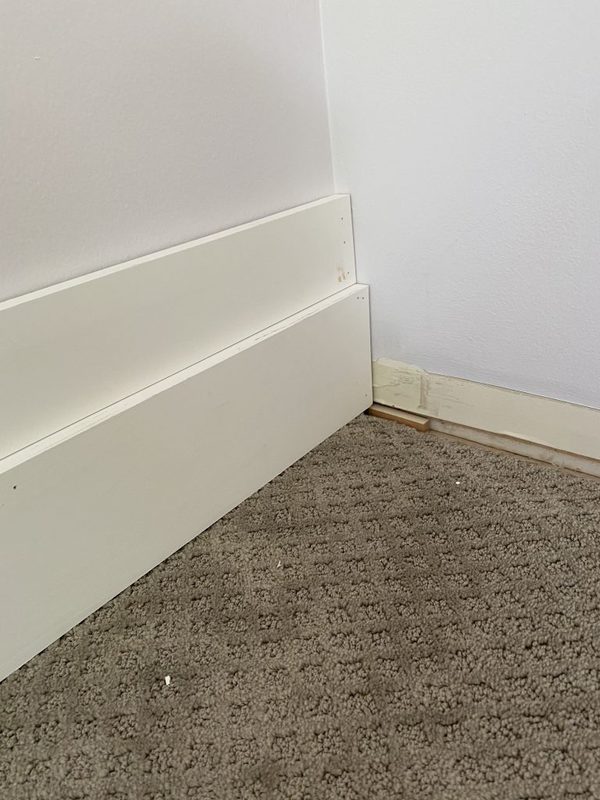
If your accent wall dead ends into another wall (inside corner) and you’re planning to keep the baseboard intact from the other wall, you’ll need to cut that baseboard back from the accent wall at the depth of your new trim work. I always use a Dremel for this situation. It’s an amazing tool that has revolutionized the way I work.
Install baseboard or base material. This ought to be thicker than first square material or furred out with shims so that it protrudes. I used 5/4” x 6” Primed Fingerjoint for this.
Always cut the factory end off, giving your lumber a fresh square cut with no paint buildup from the factory priming. Then you can measure from this end and cut your piece to length, giving it two clean and square ends.
I use 2” Nails (18 gauge brad nails for trim) for almost all trim work. By alternating the angles used to fasten the wood to your walls, you create incredible holding power in the drywall so that hitting studs (for trim work applications only) is unnecessary. The 2” nails are essential if you are not hitting studs.
Install first layer of material on top of base. I used 1 x 4 Primed Fingerjoint to create our squares.
Next, install top layer of this material at the ceiling.
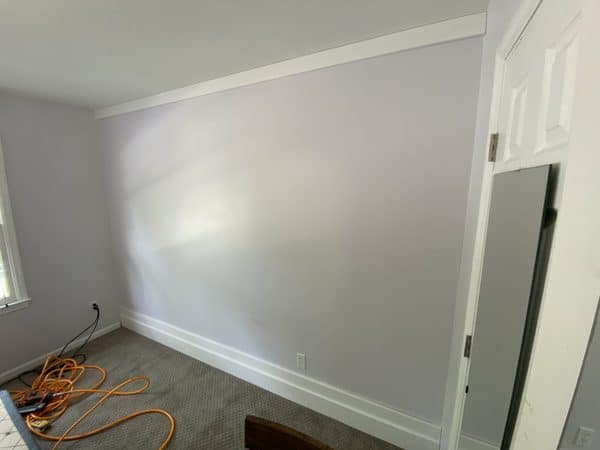
Then, measure, cut and install vertical pieces on right and left sides. Now you have your perimeter set.
Step 2: Take your measurements
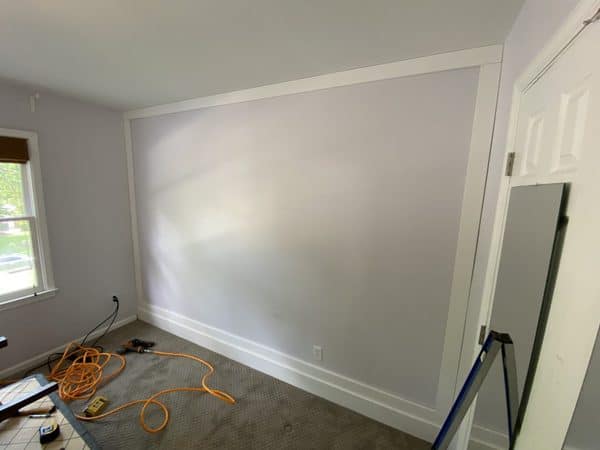
This is where you take your actual measurements and begin to do math. Mark in pencil along the bottom of your 1×4 board where you’ll place the rest of your vertical pieces. Mark this exact measurement on the top board as well.
Measure each location height where you’ll be installing the remaining vertical pieces, but don’t just cut them all the same length! You’ll be surprised how much variation there will be across one 12 foot long wall. Don’t worry, it won’t look different, but no wall is perfectly square or even all the way across.
As with the vertical pieces, you’ll want to measure every horizontal piece at its location. Here’s where things can start to get frustrating. Walls tend to be much more wavy than you might expect when going side to side across a room.
Walls tend to bulge out at stud locations and bow in at the gaps between studs. Installing your vertical boards isn’t too much of an issue, but getting your horizontal boards to line up perfectly with your vertical boards will almost never happen without manipulating the wood.

Step 3: Hammer in vertical and horizontal boards
Use a hammer and a chisel to slightly pull vertical boards out where needed, and shoot a nail 1.25” or 1.5” 18 gauge brad nail through your horizontal board at a 45 degree angle into your vertical board once their surfaces are flush.

I don’t usually use a 2” nail here because it’s easy for the nail to pop out the face of the trim when shooting at this angle. I typically keep my chisel behind whichever board needs to come out to help keep the surfaces flush while I shoot the nail. Then I remove the chisel.
You’ll need to do this at every intersection where horizontal meets vertical at both the top side and the bottom side to keep the entirety of the faces flush. Yes, pulling out boards slightly will create slightly larger caulking joints at several locations, but this extra caulking work is worth having a perfectly flush face to all of your trim work.
Step 4: Fill nail holes, sand and caulk
After I’m done nailing everything, I fill nail holes with drywall mud using a thin razor blade. After it dries, you’ll sand all nail holes. Then, I usually spot check the nail holes and see if some of them need one more fill coat of drywall mud.
I use mud because it is so much smoother and sands to perfectly flush, unlike caulking. While caulking is great for joints, it looks terrible when used as a nail hole filler.
After this, I caulk the joints between the wood and the wall. This will usually require 2 runs of caulking. Apply one bead and smooth it into the joints, then let it dry for around an hour.
Now you can apply the second coat. In very wavy wall situations, you may need to do a third pass with caulking the next day, as caulking will slightly shrink overnight. This is totally normal and not a problem at all.
Wait 24 hrs to make sure all caulking has cured and looks good, and now you can paint!