Modern farmhouse shiplap fireplace
When we moved in to our home, the living room lacked natural light and oversized built-ins around our fireplace made the room feel small.
The first project we tackled in our fixer upper was creating a focal wall around our fireplace. We had saved tons of ideas on shiplap fireplaces and quickly got to work sketching out a design that would work for the space.
Thinking about adding a shiplap fireplace to your home? Here’s how to achieve the modern farmhouse shiplap fireplace look, step-by-step.
Building a shiplap fireplace
Step 1: Select your material
For your sake and for the sake of those who will have to look at your shiplap, use real shiplap. You may see money saving tutorials that recommend cutting strips of MDF and nailing them to your walls or framework.
Not only is this material incredibly annoying to finish (sand, prime, finish paint, etc.), but it is obvious when anything other than the real thing is used for a variety of reasons.
First of all, there’s no wood grain in MDF (Medium Density Fiberboard). Even if you paint it with a brush in the direction that wood grain would be going, it’ll never truly look like wood.
Secondly, MDF has tiny “hairs” that stand up in locations where you’ve made cuts and where you’ve applied paint. The surface gets rough as the paint dries and requires tedious sanding of joints and gaps as well as sanding of the entire face before a second coat can be applied.
Thirdly, MDF has very little tensile strength, so it will bow and bend if not supported by a proper backer. While wood can easily span the typical 16” gaps between studs without bowing, MDF will need studs spaced around 10” apart or a wall of drywall to attach to.
Fourthly (how often do you get to say fourthly?), knicks and dents are much more difficult to repair than with wood. The hair stands back up so you’ll get to sand it, then you’ll get to prime the exposed material, sand it again, finish paint it, sand it again, and finish paint it again. Do you need any more reasons?
Now that you know what NOT to buy, here’s what you SHOULD buy…
First decide if you want to 1) stain, clear coat or whitewash your material or 2) paint it.
If you’re going for option 1, you’ll need to buy “Stain Grade” shiplap. Stain grade lumber is slightly more prone to warping than “Paint Grade,” but a short span like a fireplace really isn’t a place to worry about warping boards.
Stain Grade material is solid wood with no joints. So if a piece of shiplap is eight feet long, it will be eight feet of the exact same piece of wood.
If a material is Paint Grade, it will have something called “finger joints” every 12” to 24.” So a single piece of eight foot Paint Grade lumber could be made of up to 6 or 7 different pieces of wood spliced together.
This greatly reduces the likelihood of the wood to warp since internal tensions in the wood grain can only affect the overall board in a 12” to 24” span before a new splice begins.
Unless you are planning to stain, clear coat or whitewash your shiplap, always get the Paint Grade material with the finger joints. Most of the time, this material comes already primed from the factory – reason #42 for choosing real wood shiplap over MDF.
Here’s the shiplap we used for our fireplace. Additionally, we wrote a whole post on where to buy shiplap if you’re interested.
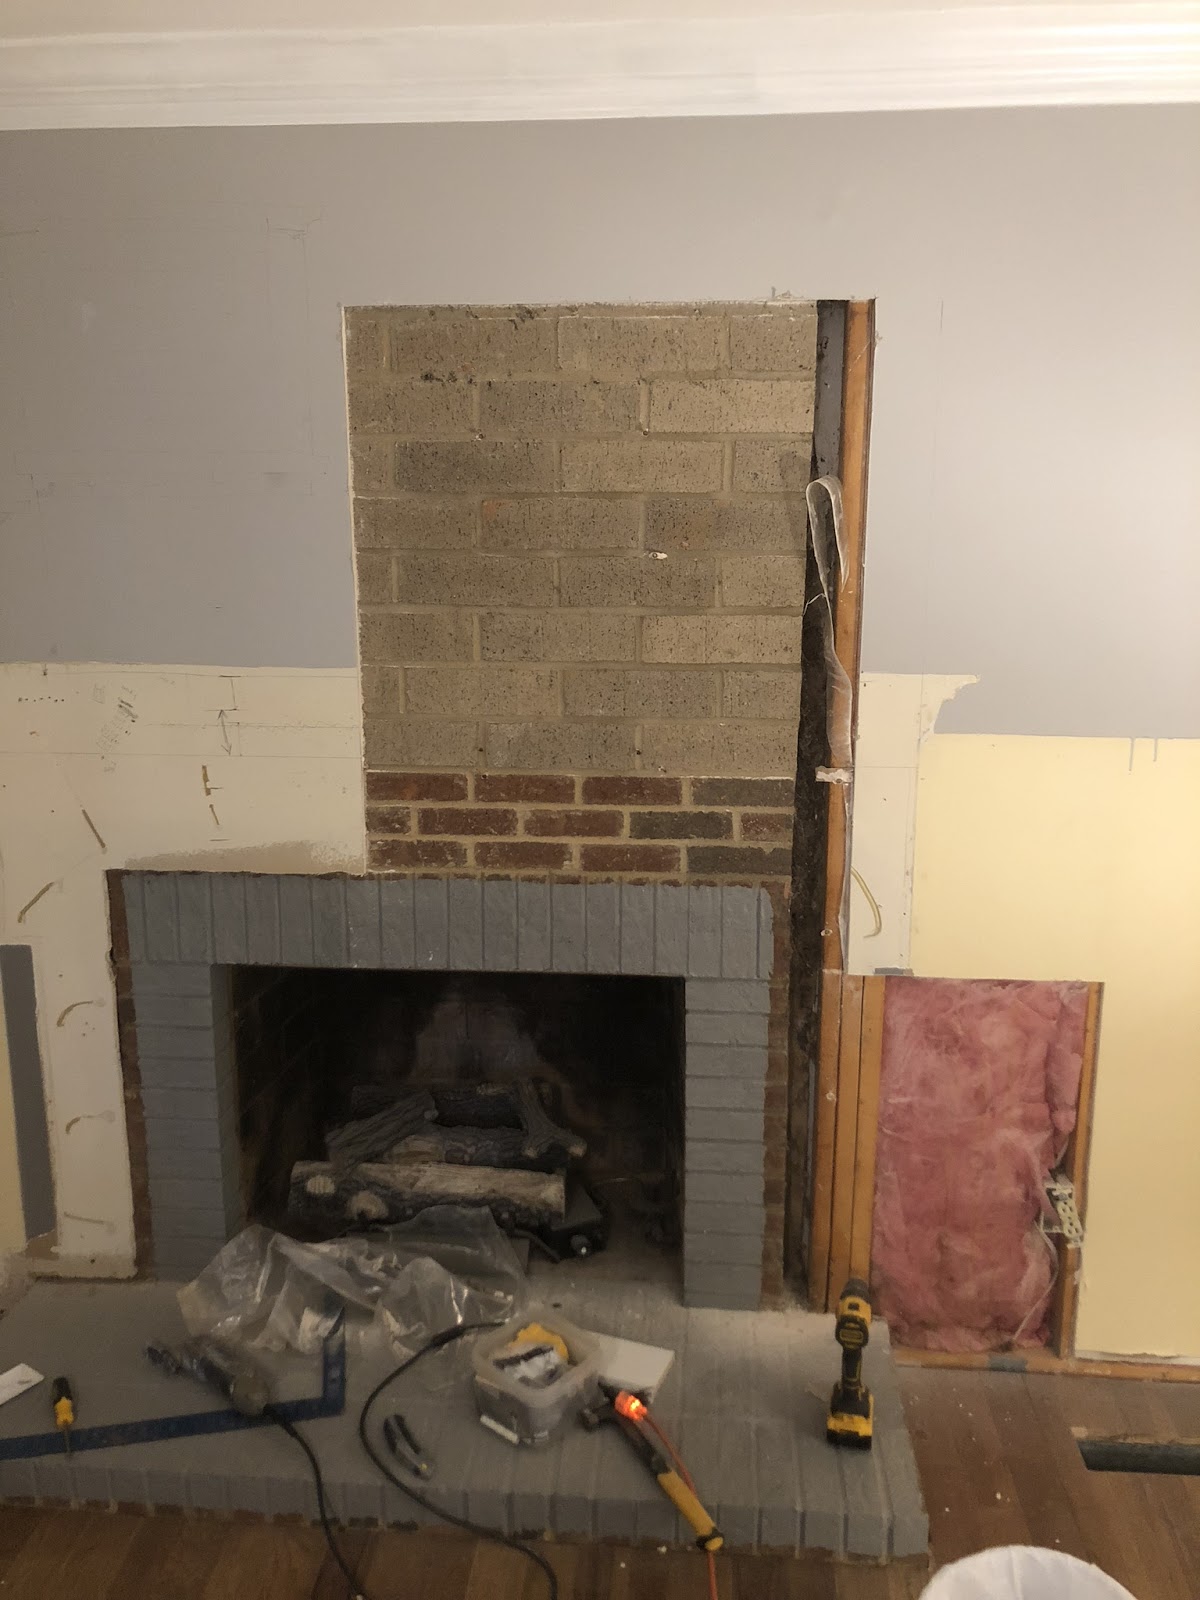
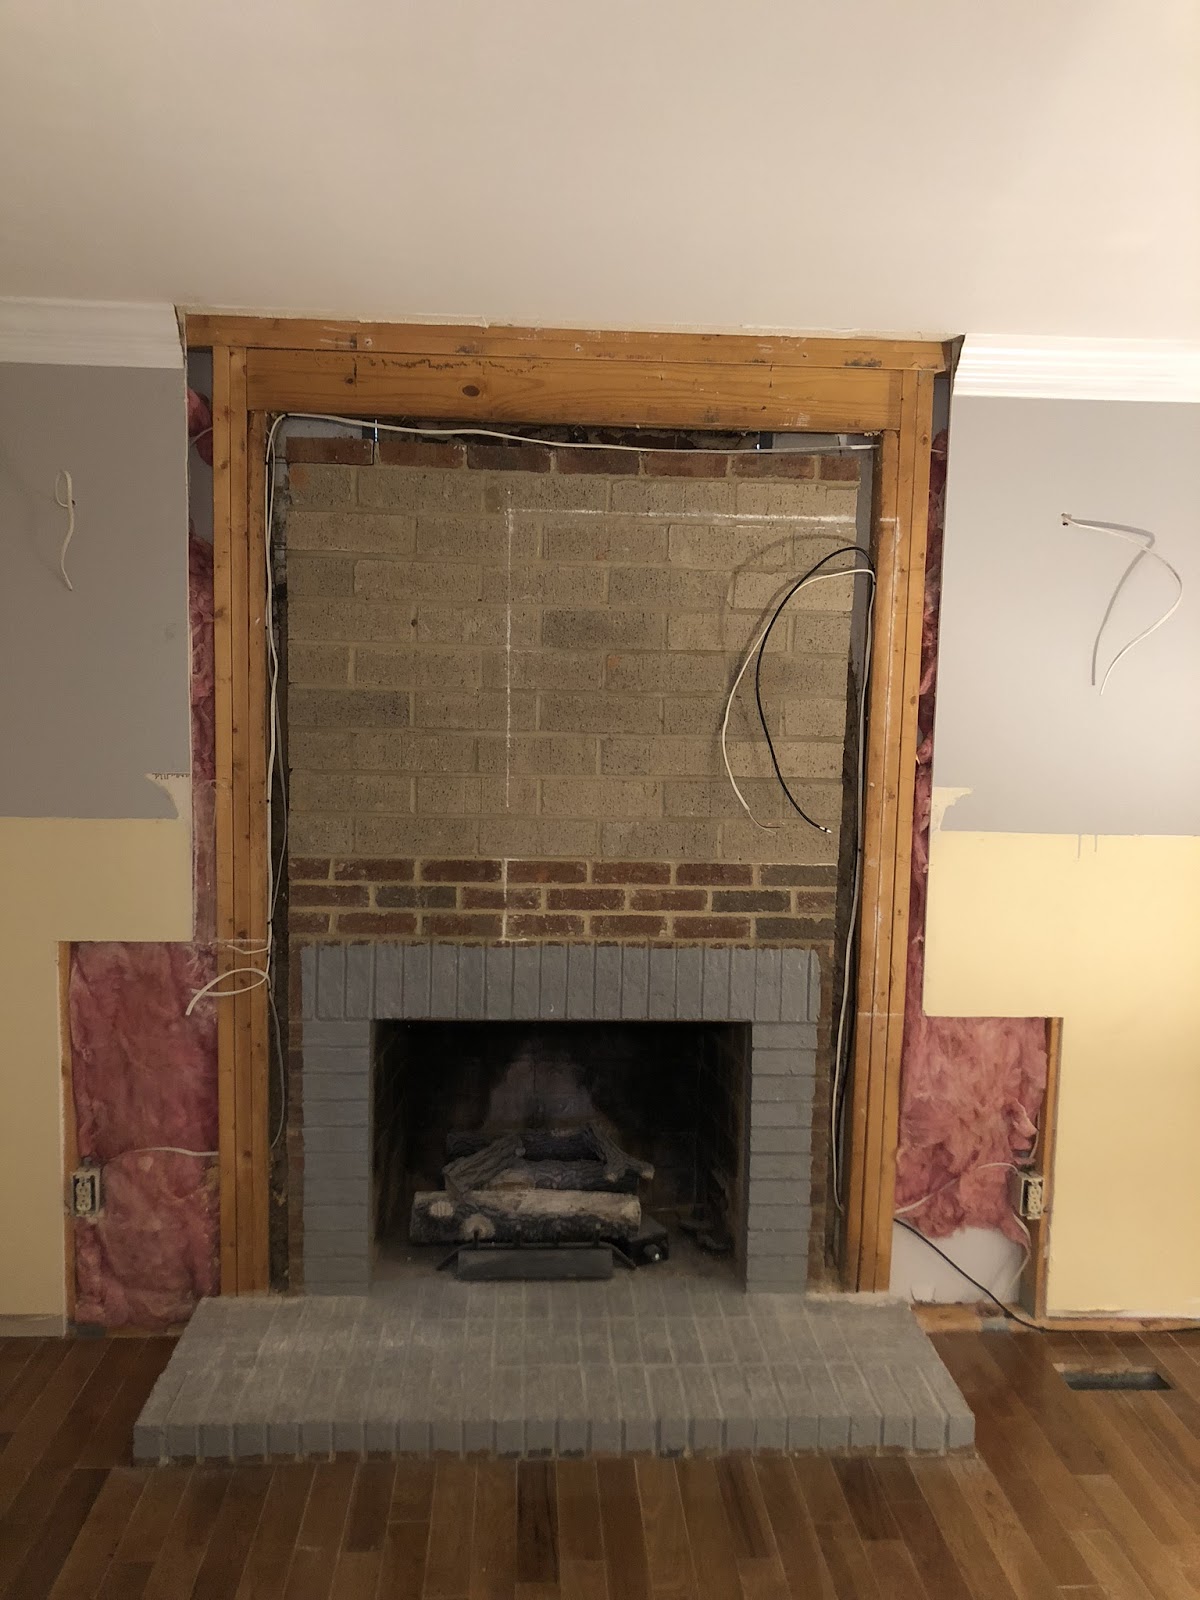
Step 2: Demo existing area
Here’s the before of our fireplace:

Demolition time. Each side of your fireplace will have studs inside your walls.
We decided to entirely remove our drywall so that we could run electrical and cable wires, so we could hide the cable box behind a tv, but you don’t have to.
You can use a stud finder or just sink a couple screws into the wall to find where they are.
Step 3: Build the framework for your shiplap fireplace
A fireplace always looks better with a little depth, so you’ll want to build out a framework from the wall.
The mantle I used was around 12” deep, so I wanted something in the neighborhood of ¼ or ⅓ of the mantle depth for my shiplap structure depth.
Using two stacked 2×4’s, I secured them to the studs behind the wall using 3” Star Drive Decking screws.
If you decide not to remove the drywall, it’s perfectly ok to screw the new 2×4’s to the wall studs with the drywall in place as long as your screws are at least 3” long and you sink them around ⅛” to a ¼” past the surface.
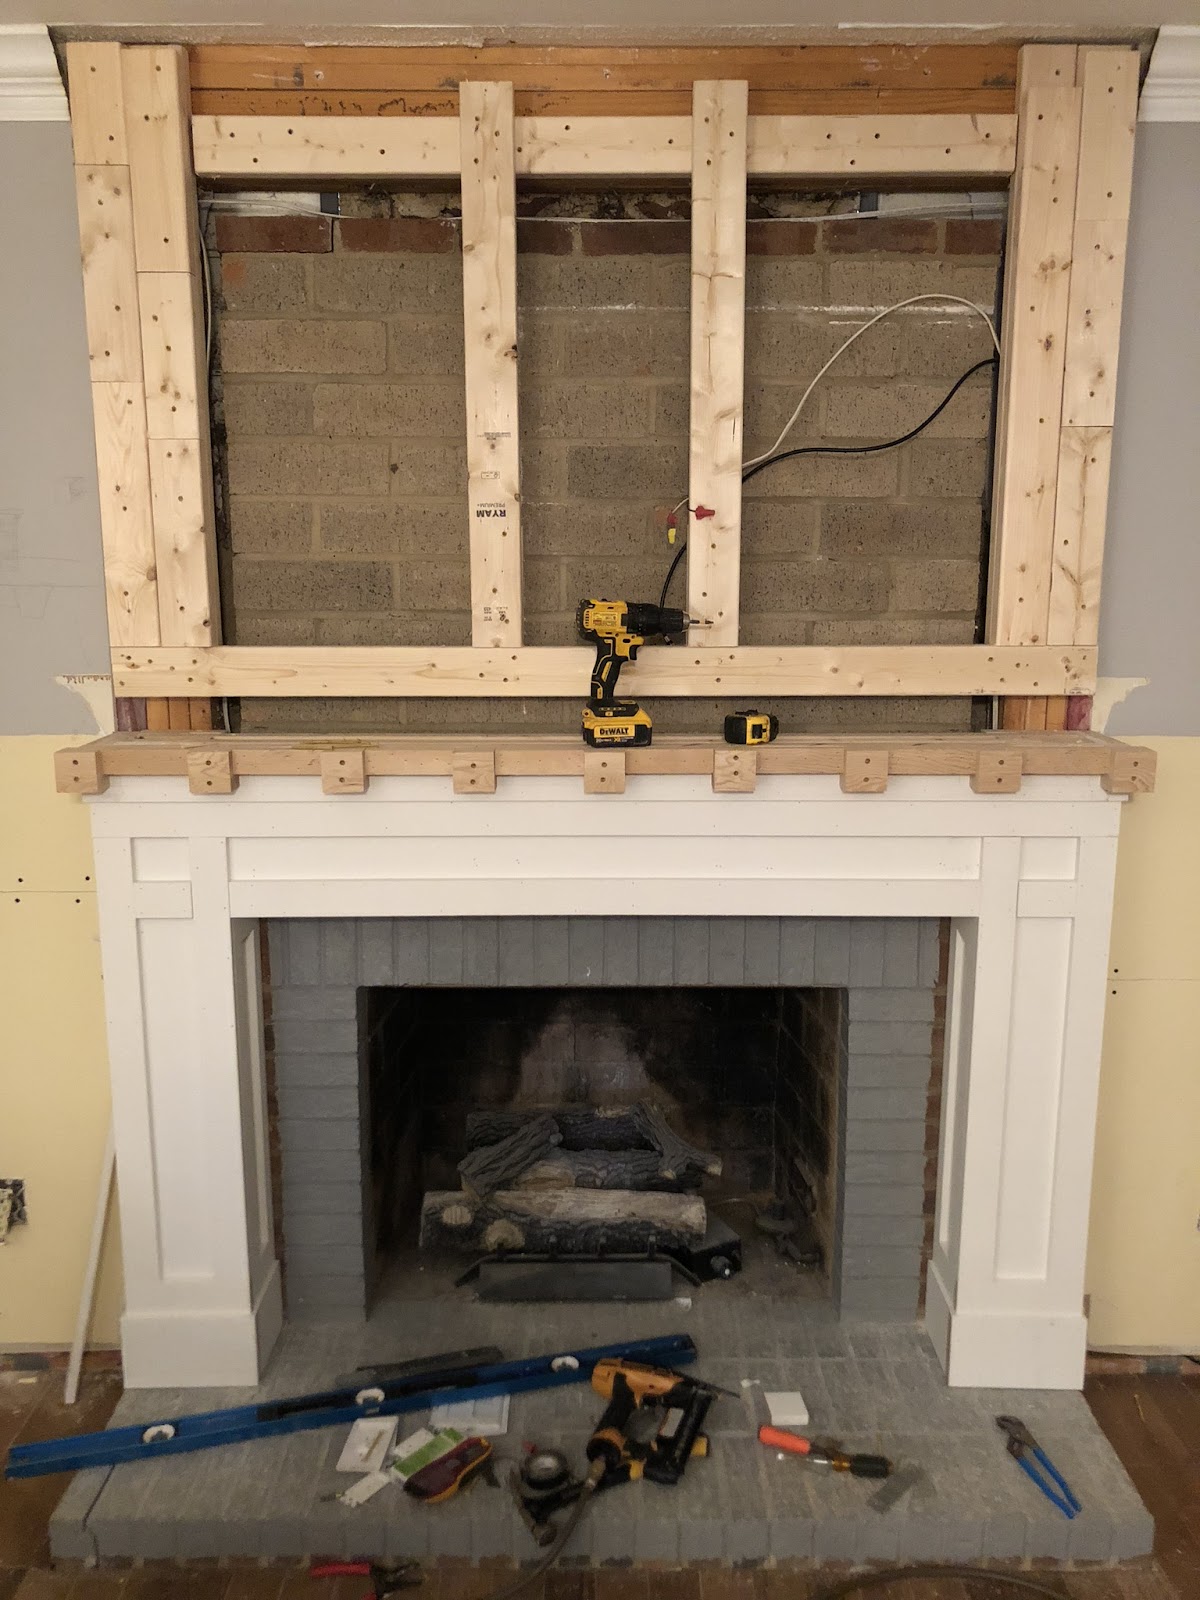
Once you’ve secured the studs on the sides, you can fill in as needed for the center with studs. We recommend a maximum distance of 20” apart when using real wood shiplap. If you’re mounting a TV like we did, make sure you place studs or cross braces between studs where your TV mount bolts go.
Step 4: Install trim
Install the side trim boards first using ¾” primed trim boards for the sides. Depending on what depth you frame out, you may have to rip this board using a circular or table saw.
The width of this board should come out to sit flush with your wood framing face on the left and right.

Now you can install your face trim that provides a picture frame feel for the shiplap. This will hide the edge of your side trim boards when you face the fireplace.
You’ll want this material to be thicker than the depth of your shiplap so that the shiplap feels like it’s inset a bit. I used primed 5/4 board trim (actual depth is just over an inch).
Step 5: Install shiplap

Cut and install your shiplap and you’re done… except for filling nail holes and painting. And your crown moulding, but that’s for a different post!
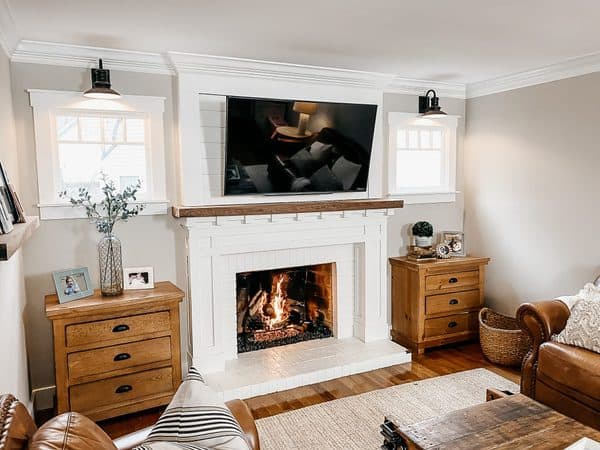
Here’s the after shot:
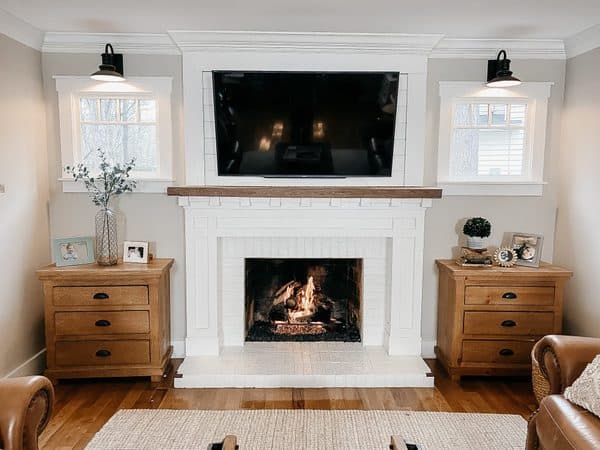
Walls are painted in Accessible Beige. Trim color used around windows and shiplap is White Dove.
Related shiplap articles
Shiplap bathroom in a modern farmhouse