Installing a shiplap accent wall: a complete how to
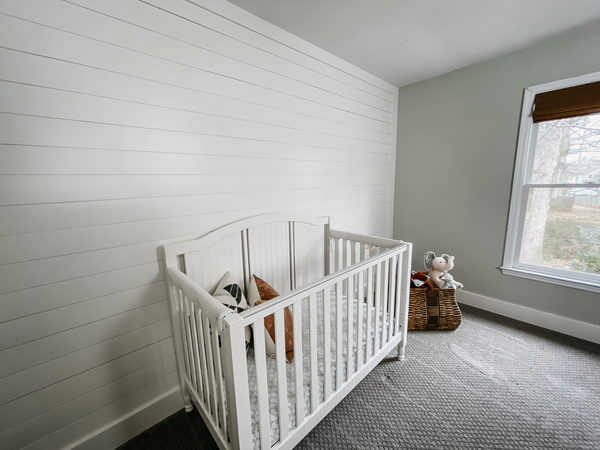
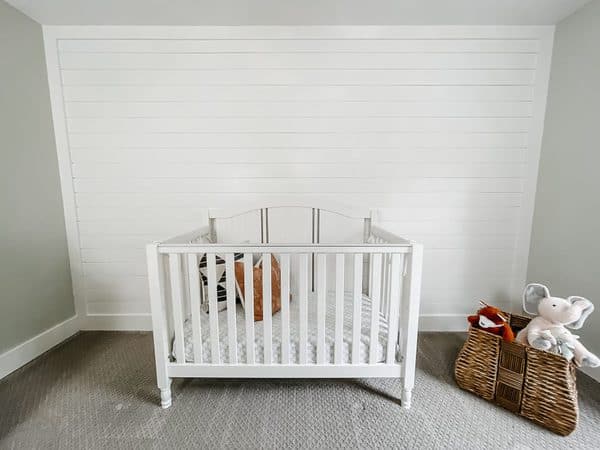
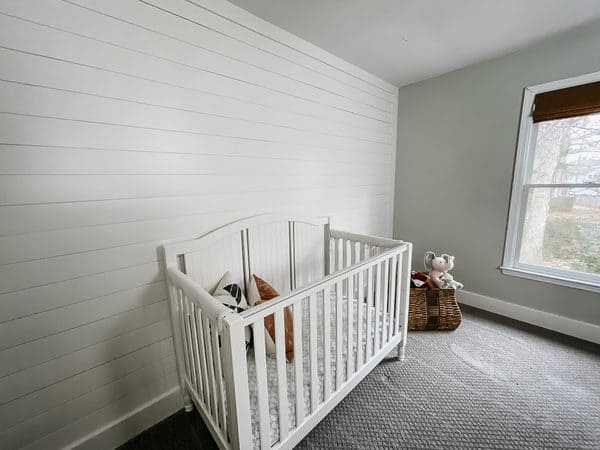
We’re shiplap lovers, over here. In the past we’ve used shiplap in our bathroom, over our fireplace and now, we’re using it in our older daughter’s room.
Installing a shiplap accent wall in her room gave it much needed character and charm. We’re loving how it turned out, so if you’ve been dying to accent a wall in shiplap, this DIY shiplap wall tutorial is for you!
This post contains affiliate links. Read my policy here.
Supplies needed for your DIY shiplap accent wall
- Shiplap boards and trim boards. We use real wood vs. mdf for this
- tape measure
- pencil
- stud finder
- Nail gun with 18 gauge brad nail gun
- Drywall mud
- Miter saw
How to instal shiplap in 6 steps
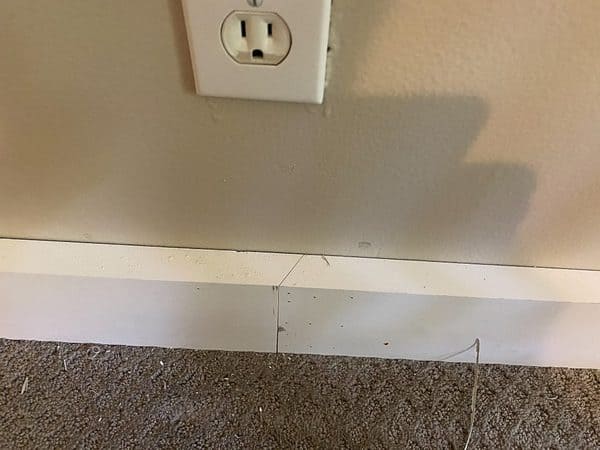
Step 1: Remove old baseboard
Remove old baseboard using a utility knife first to cut the old caulking lines where the baseboard meets the wall. If you don’t do this, you’ll end up pulling large sections of the drywall paper surface up with your baseboard that will require repairs later.
If your accent wall dead ends into another wall (inside corner) and you’re planning to keep the baseboard intact from the other wall, you’ll need to cut that baseboard back from the accent wall at the depth of your new trim work. I always use a dremel for this situation. It’s an amazing tool that has revolutionized the way I work.
Step 2: install baseboard
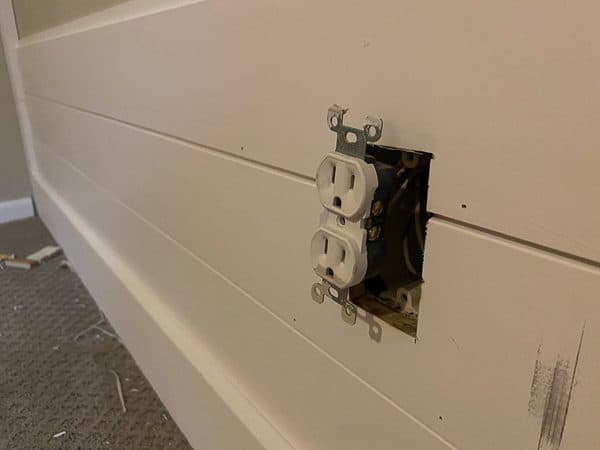
Install baseboard or base material. This ought to be thicker than your shiplap to create depth for the wall.
Nothing looks worse than wall trim work installed at the same depth as the baseboard or, worse yet, when the trim work hangs over the base because people were too lazy to remove it and reinstall it later.
We used 5/4” x 6” primed fingerjoint for this. Always cut the factory end off, giving your lumber a fresh square cut with no paint buildup from the factory priming. Then you can measure from this end and cut your piece to length, giving it two clean and square ends.
We use 2” nails (18 gauge brad nails for trim) for almost all trim work. By alternating the angles used to fasten the wood to your walls, you create incredible holding power in the drywall so that hitting studs (for trim work applications only) is unnecessary. The 2” nails are essential if you are not hitting studs.
In a previous post, we outlined the full process of installing farmhouse baseboard in your home!
Step 3: Create the frame
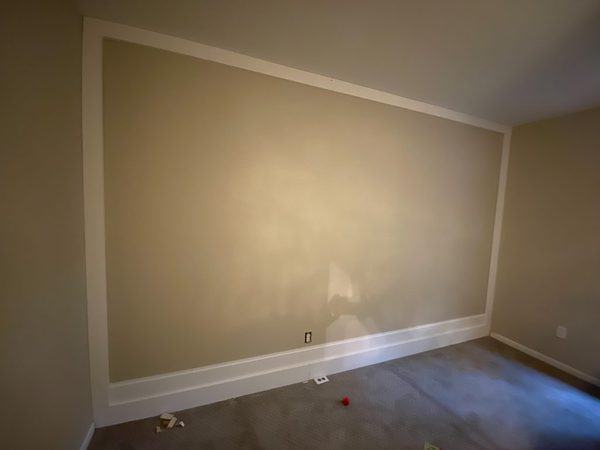
We decided to create a picture frame look by having our thick trim work go up both sides and across the top. Some people prefer the shiplap dead end into the wall without this trim work – either way is fine, but we really think this way looks better! If you’re picture framing, that process is fairly obvious: measure, cut and install on the wall.
Step 4: Start installing the shiplap
Next, begin by placing your first (measured and cut) piece of shiplap directly on the baseboard you installed.
Use 1.75” 18 gauge nails for shiplap. If you have a stud finder, mark the studs and hit those with your nails. If you don’t, alternate the angle you shoot each nail left and right at around a 20 degree angle.
These opposing angles for your nails help to secure the board extremely well. Nails should be shot through the top raised lip so that the next piece will hide those nail holes.
As you continue up the wall with the shiplap, you will need to secure each new board to the one below it by nailing a few nails through the bottom of each board into the lip beneath it. I recommend one nail every 16 inches or so. This will keep everything tied together without giving you thousands of nail holes to fill later on.
Step 5: Install final top piece of shiplap
The top piece can be tricky, especially if you don’t have a table saw. But don’t worry, caulking is your friend. Even if your cut isn’t perfect, you’ll be able to hide it. Odds are, you’ll have to cut the top piece because the math won’t work out perfectly for you to get a wide piece up at the top.
Cut this very slowly and carefully and with eyewear and headphones. If you aren’t comfortable cutting this board, you can take it to a local lumber yard and they will likely cut it for you for a fee.
Step 6: Fill nail holes and sand
After I’m done nailing everything, I fill nail holes with drywall mud using a thin Razor Blade. After it dries, I usually spot check the nail holes after lightly sanding and see if some of them need one more fill coat of drywall mud. We use mud because it is so much smoother and sands to perfectly flush, unlike caulking. While caulking is great for joints, it looks terrible when used as a nail hole filler.
After this, we caulk the joints between the wood and the wall. This will usually require 2 runs of caulking. Apply one bead and smooth it into the joints, then let it dry for around an hour. Remember that less is more with caulking.
Wait 24 hrs to make sure all caulking has cured and looks good, and now you can paint!
FAQ about shiplap accent wall
Do you start shiplap from top or bottom?
Shiplap should always be started from the bottom. It was originally used in exterior applications and was designed to shed water out away from the house. Roof shingles “lap” over each other. As you install the bottom run, the next run will lap over it.

Does shiplap have to go over drywall?
No; in fact, in small rooms like bathrooms and laundry rooms, I will usually tear out all of the drywall so that the room is not made even smaller by the depth of the shiplap.
Drywall is usually ½” thick already, so installing shiplap over it steals another ⅝” all the way around the room. You can nail the shiplap directly to studs when drywall is removed.
Should you paint shiplap before installing?
It’s a good idea to paint the upper protruding tongue of the shiplap first if you are going to use any color other than white. Without a paint sprayer, it’s very tricky to fully cover that tight area with paint after installation when using a brush.
Runs and paint blobs will inevitably form in that groove if you are using a brush. As far as the face of the shiplap, your nail holes will need to be filled and painted over at least twice for the paint sheen to fully saturate the drywall mud and blend in. This often ends up turning into an entire paint job, so I typically will not pre-paint my shiplap.
Do you put trim on shiplap?
An alternative way to create depth is to apply your baseboard and picture frame trimwork to the face of the shiplap rather than framing the wall first. This is usually a little easier for people who don’t do a lot of this kind of work.
However, if you do go with this route, you won’t want to use the 5/4 board mentioned above. Instead, you’d want to go with 1 x 6 and 1 x 4 primed lumber so that the depth reveal is still around ½’ to ¾” difference from the shiplap depth.