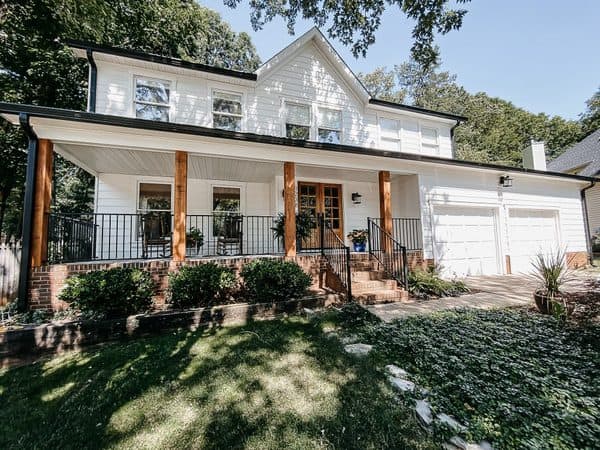
How to wrap front porch posts to instantly boost your curb appeal
One of the easiest and cheapest things you can do to add value and enhance your curb appeal is to wrap your skinny porch columns so that they look more substantial.
If you’d like to improve the look of your home’s exterior, follow along as I show you how to wrap your front porch posts, step-by-step.
This post contains affiliate links. Read my policy here.
How to wrap front porch posts
Before we get into the step-by-step instructions, there’s a couple things you should think through:
Decide how large you’d like your posts to be
I really wanted my posts to end up around 8” square, so I purchased 4 pieces of 1 x 8 (¾” x 7 ¼” actual dimensions) material that were 8 feet long per post. With 4 posts, I needed 16 pieces of this lumber.
Decide whether you want the posts stained or painted
This will impact your material choice.
If you want to stain the posts, you have two options: smooth or rough lumber depending on the look you want. We opted to stain our porch posts, and the back side of the rough lumber shows all kinds of saw markings on it, which is exactly what I wanted for our porch.
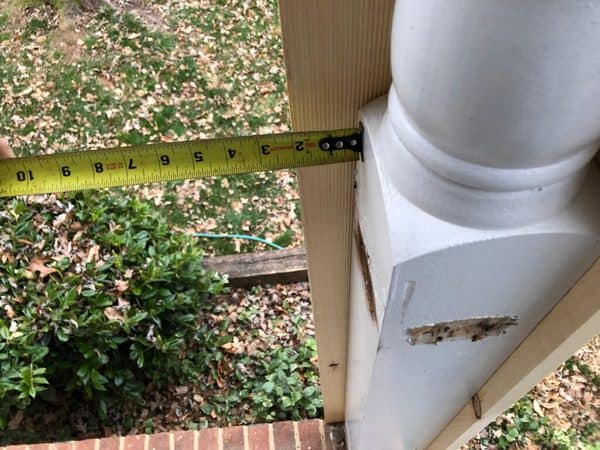
If you want to PAINT the posts, purchase this type of wood. It comes primed and is very smooth, ready for finish paint. Measure your existing post widths. Mine were 5.5” square, and I was increasing them by 1.75” since I used 7.25” material, the actual measurements of my 1x8s.
On the different cuts needed

Of your 4 boards for each post, 2 will need to be ripped on a table saw to achieve a perfectly square post.
Some contractors will try to rip every board at a 45 degree angle on both sides of each board, mitering the corners the entire length of the boards. Don’t do this.
If you ever actually succeed initially in getting all of the corners to tighten up during the installation, it won’t be more than a couple months before these joints begin to open up and separate, as the wood expands and contracts.
It’ll be perfectly square, but It’ll look perfectly terrible. Square edges ending into square edges hold up much better over time and provide a much stronger connection for your nails.
If you don’t have a table saw, you probably won’t be able to get a perfectly square post, simply because of available lumber sizes, but you can get close by purchasing 2 boards that are the width of your desired post, and 2 boards that are the next dimension smaller.
In my case, I would have needed to buy 2 pieces of 1 x 8 and 2 pieces of 1 x 6. The 1 x 6s would be set in between my 1 x 8s. This would create a 7.25” x 7.00” post — only .25” away from perfectly square. That’s pretty close to square, and no one will notice but you, if you decide to do this.
However, if you try to do this with 1x6s and 1x4s, you’ll end up with a .5” difference, and it will definitely stand out, especially since this is a smaller column to begin with. So, if you want a perfectly square post, you’ll need to rip 2 of your 4 boards on a table saw.
Materials needed to wrap front porch posts
- 4 pieces of lumber per post (in my case, 4 pieces of 1×8, eight feet long.)
- 2” 18 gauge brad nails
- Stain and Polyurethane or Primer and Paint
- Paintbrush
- Scrap wood for cutting shims (a 2×4 or 2×6 is perfect)
Tools needed to wrap front porch columns
- Tape Measure
- Pencil
- Air Compressor with hose
- Brad nail gun capable of shooting 2” 18 gauge brad nails
- Table saw
- Hammer
Instructions for wrapping front porch posts with wood
Step 1: Measure the width of your boards (my 1 x 8’s were 7.25” wide)
Step 2: Measure the thickness of your boards (my 1×8’s were .75” wide)
Step 3: Double the thickness of your boards (.75” x 2 = 1.5”)
Step 4: Subtract this double thickness measurement from the width of your boards (7.25” – 1.5” = 5.75”)
Step 5: Rip 2 of your 4 boards on the table saw down to this measurement. (Tip: rip both boards down to about 1” larger than the measurement you need, then flip the board and rip the other side of it to the final measurement so that both edges of the ripped board end up getting cut on the table saw. This gets rid of the slightly rounded edge the boards have on them from the factory, creating a very sharp, clean joint for installation.)
Step 6: Measure the height of your posts and cut all 4 boards to this height. (Some porches are slightly sloped away from the house for water drainage, so measure the front side and the back side of your existing posts and compare. If these measurements are slightly different, you’ll need to cut them according to their locations. Also, each post may be as much as a half inch different from the other posts on your porch, so only cut the boards for one post at a time).
Step 7: Once you’ve cut your boards to the proper height, you need to seal the “end grain” exposed by your cut (the top and bottom edges). This process is incredibly annoying because you think you’re finally ready to see how awesome your posts are going to look, but if you skip this step, the bottom of your boards will eventually rot out from soaking up moisture and you will say to yourself, “Self, why were you so lazy when you did this?” ha.
For PAINT applications, prime the bottoms of the boards, let them dry for 5 minutes, then prime them again. Wait ten minutes, and apply a coat of finish paint to the bottom. I recommend you apply at least 2 coats of finish paint.
For STAIN applications, use a clear coat of polyurethane and apply at least 2 coats of it, waiting for it to dry between coats.
Step 8: Begin by installing one of the RIPPED boards on the SIDE of your post. We want to save the full width boards for the front and back of our posts so that no joints are visible from the street where people drive past with a wagging finger of merciless judgement.
Using your nail gun, attach the board so that one edge of it extends slightly past the front of your post. Don’t try to set this board perfectly flush with the edge of your old post. Trust me, years of experience have taught me to make sure that my front board contacts the side boards without any potential for paint globs or slight inconsistencies in my original post that would not allow it to fully contact my side boards.

Nailing Tip: Nail the board to the post at multiple angles rather than only directly in at a 90 degree angle. I alternate my nails at around a 25 degree angle in each direction. This provides a much greater holding power for the nails when you do this. If your board wants to warp over time, this nailing pattern will minimize any bending the board can do.

Step 9: Now attach the front board to the face of the post. The first places you need to nail here, however, are NOT into the original post. You need to overlap this face board so that it sits perfectly flush with the outer edge of your side board.
Start at the bottom and sink a few nails around 1” apart. I usually set the bottom perfectly, then move up about 12” and get that section perfectly set with a few nails (the face board will bend into place if you apply pressure), then move up another 12” until I reach the top.
Only AFTER I have fully secured my face board to the side board do I begin sinking a few nails into the original post because I want my joint to look right. Once you sink nails into the post beneath, there’s no altering your joint.
Step 10: So now you have 2 boards installed. Now you need to measure how far each board hangs past your old post.
Let’s start with the side board you first installed. It will be hanging past your post on the back side. Mine was hanging past about 1”, so I cut several 1” shims around 5” long and nailed them in 3 locations regularly spaced to the back of my old post.
Next, do the same thing for the side where your face board hangs over – but remember to subtract the thickness of your boards on this one. My overhang for my full width front board was 1.75”, so I took a 1.75” overhang and subtracted my ¾” board thickness to get 1”.

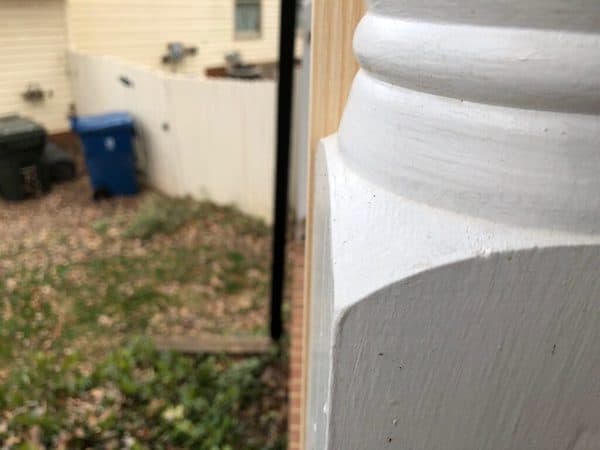
Cut these shims and install them in three locations like you did for the back shims. I HIGHLY recommend that you install a shim from 3” – 7” height and also one at 33” – 37” height if you are planning to attach railings to these posts. This will protect your column boards from bending when fasteners are used to connect railings at standard heights. Check your local building codes to make sure that you install railings if they are in fact required for code compliance. You’ll notice that the shims pictured above are actually too thick because I forgot to subtract the width of the side board. Oops! I had to take these off and cut new thinner shims so that the side board would sit inside the front board. It’s easy to make mistakes on something that seems so simple, but every little decision you make affects the next step, so take your time!
Step 11: Install the full width back board now in the same way that you did for the front board, only attaching this board to the old post AFTER you’ve secured the joint from bottom to top.
Step 12: Slip the final side board into the gap. If it’s difficult to slip in, you can pull on the front and back boards to help it slide into place. Use a hammer on a flat piece of scrap to help tap the board in and sink a few nails wherever your joints are correctly aligned.

I often attach the bottom once it’s in position, even if the top is hanging out an inch or so. You will not likely get the entire board into the correct position at all joints at the same time, so work up the board a few inches at a time, sinking nails as you go.
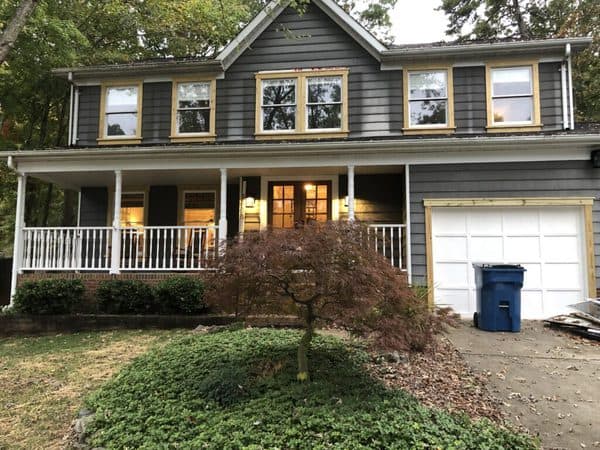
That’s it! Here’s a picture of our finished project: