DIY floating shelves using real, solid wood
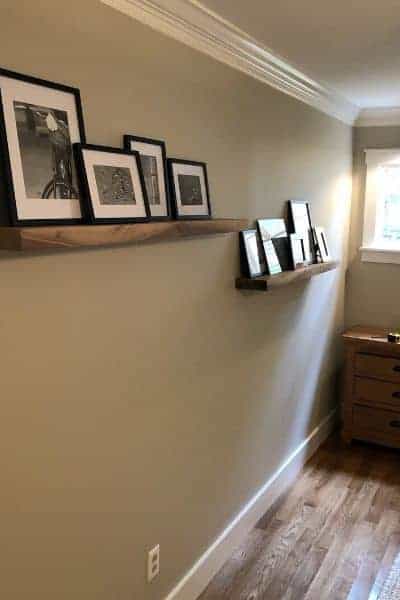
Floating shelves are the perfect addition to any bare wall and are surprisingly DIY-friendly.
Rather than using low quality hardware, fake floating shelf material, or low quality lumber that you can get from many big box retailers, I’m going to teach you how to use quality lumber to make beautiful DIY floating shelves with beautiful, solid wood.
Where can you get quality lumber to make DIY floating wall shelves?
Retailers like Woodcraft typically carry a multitude of wood species to choose from; you can find things like walnut, oak, douglas fir and more there. If you don’t have a Woodcraft, you can check out a local lumber yard which will carry oak and douglas fir.
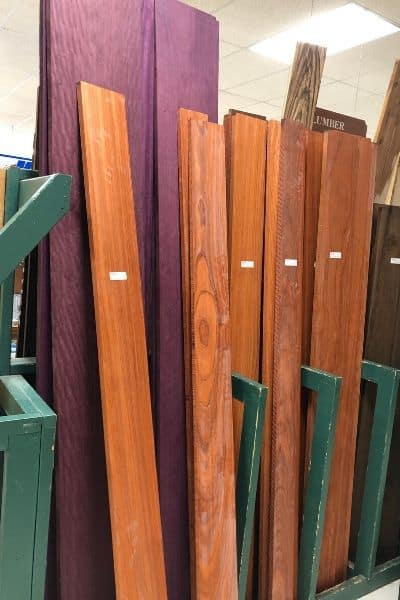
Tools/supplies needed to make floating shelves:
- Stud Finder (no stud finder? That’s ok, just follow instructions below).
- Level (no level? That’s ok)
- Drill
- Drill index
- Pencil
- Lumber
- ledger lok bolts
Note: these materials and following directions are for shelving Material 1.5” to 2.5” thick. For thicker materials, you’ll need to use larger bolts and a different attachment method.
DIY floating shelves using quality lumber in 6 easy steps
Step 1: Determine floating shelf height
Determine height you want the TOP of the shelf to be and make a light mark in pencil.
Set level up on this wall and mark (VERY lightly so you can erase it). If you don’t have a level, measure from the floor to your mark. Then take that measurement to the left and right and mark each point approximately where you think the edges of the shelf will be. Find something straight and mark a continuous line between the two outer marks you just made.
Step 2: Find studs
Find all of the studs in the space where you’ll be mounting the shelf. Need help finding a stud? Watch the video below, or you can employ the guess and check method.
Here’s the guess and check method to finding studs: Let’s say that your shelf material is 1.5” thick. (make sure you know exactly where you want your shelf before you start this alternate stud-finding process!)
First, knock on your drywall along the shelf area, slowly moving your knocking across from one side to the other. You’ll notice that the sound of the knock sounds hollow at times and very solid at other times. These solid sounding knocks mean you are very close to a stud.
Second, mark each spot (slightly below where your pencil line is) that you think sounds the most dense.
Third, take a drill and drive a 2” or longer screw (you could also use the LedgerLok bolts you bought to hang these shelves) into the wall at each of these spots around an ⅛” below your level mark (Don’t go lower than this or these holes will interfere with your ability to drive the bolts where you need them later into the wall and through the drywall).
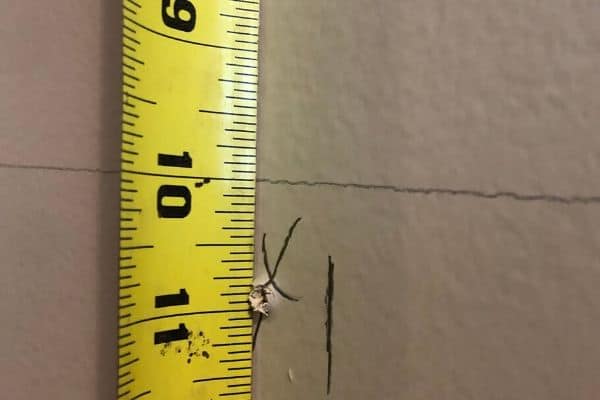
If you missed a stud, the screw will begin to spin on its own without sinking the screw head into or through the drywall.
As I showed you in the video with the stud finder, you need to know the edges of the stud so that you know you’re sinking your bolts into the center of the stud.
Just because you hit a stud in the guess and check method doesn’t mean you’re in the center. So you’ll need to move your test screw around a half inch to the left and right, repeating the driving of the screw in until you miss a stud on both sides. This will get you really close to knowing where the center of your stud is.
If you missed a stud on your first try, move your test screw over around an inch to the left and right until you hit a stud. Then you can begin trying to find the edges of the stud with the half inch testing mentioned above.
Measure ¾” down from the level line you drew earlier and lightly mark a new line. You can just mark this new height over the areas where your studs are if you want to.
Step 3: Drive ledgerlok bolts into studs
Drive your LedgerLok bolts into the studs at this height at a very slight angle down.
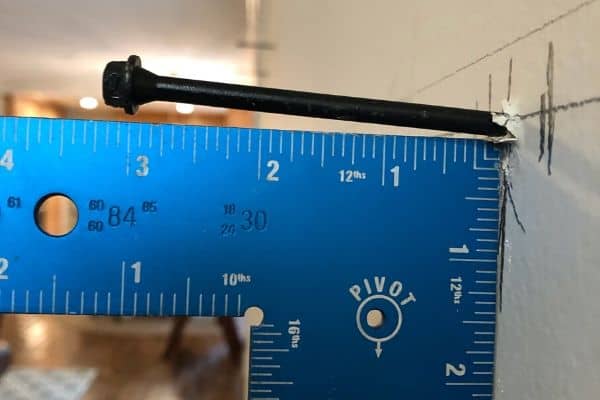
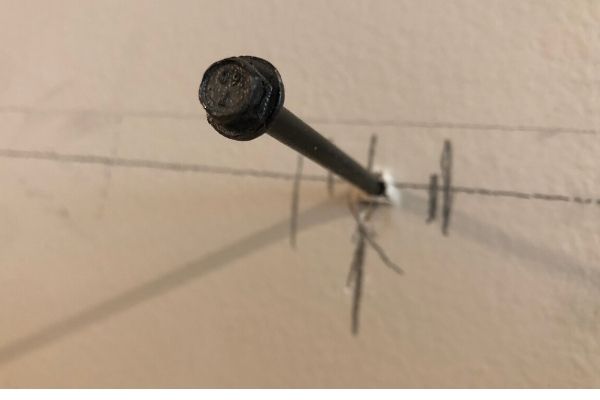
Why?
These bolts are designed to connect roof trusses to walls in new residential construction. They’re super strong when it comes to sheer strength. Sheer strength is essential in a bolt like this to prevent the bolt from snapping in half — and these LedgerLok’s have a very high sheer strength.
This means that a heavy piece of lumber is no problem for them to hold up. However, they do flex (by design from the manufacturer so that they won’t snap in half) under the weight of a very heavy shelf with heavy picture frames on it. That’s why we drive them in at a slight angle down.
We want them to rest level once they’re fully loaded with all the sentimental crap you plan to stack on them.
Note: for every 12 pounds you plan to stack on the shelf, you should have at least 1 bolt in a stud. So 36 pounds, shelf weight included, ought to have 3 or more of these bolts.
Your bolts should go into the wall at least 2.5”. Since drywall is ½” thick, this means you’ll have around 2” of bolt thread biting into your studs. I want the portion of the bolt still visible to be more than half the depth of my shelf.
So let’s say I went to Home Depot and bought a Pine or Spruce 2×6. The actual measurements of a 2×6 are 1.5” x 5.5”. So I divide my 5.5” deep shelf by two and I get 2.75”.
Since I want the amount of protruding bolt to be more than this, I’ll go ahead and say I want it to be 3.25” out from the wall once I’ve sunk the screw into the wall. This means I’ll need a bolt to be around 6” long to achieve this (since they don’t sell bolts at 5.75”.)
Step 4: Measure the diameter of the bolt head
Mine are ½” across. This means I’ll use a drill bit for the back of my shelf that’s slightly larger to allow a very small amount of wiggle room. I used a 9/16” drill bit to bore my holes in the back of my shelf. This is only 1/16” larger than my bolt head, which means that the hole actually only provides 1/32” around the screw head… A nice snug fit.
I found that drilling the hole exactly the diameter of the bolt head was too tight and didn’t allow the shelf to sit well against the wall.
Step 5: Get ready to drill your holes
Set the shelf on the wall and fold it down flat against the wall. Carry your marks onto your shelf at exactly the same position, marking them all without moving the shelf.
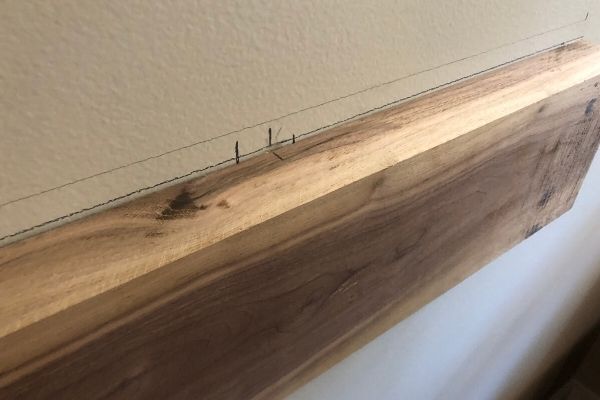
Measure down ¾” from the top of your shelf at each position where you marked for each bolt. Drill to slightly deeper than the depth of your screw.
Our example above used 3.25” as the protruding measurement of our bolts from the wall, and we’ll drill 3.5” deep to make sure our shelf will slide all the way against the wall and not get stopped by the bolt head.
Tip: you can mark on or place tape on your drill bit at the desired depth to help you know how far you’ve drilled.
Step 6: Slide your DIY floating shelf onto the bolts
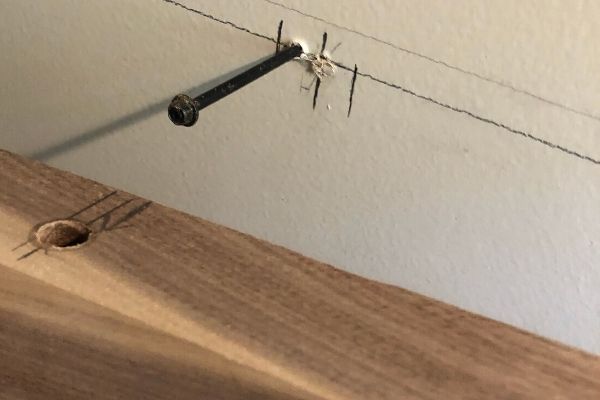
You may need to slightly manipulate the bolts into the holes before it will slide in. It’s ok to slightly bend the ends of the bolts into the holes.
At this point, your shelf will more than likely be angled down towards the wall because you drove the bolts in at this slight angle downward. Once you’ve put all your stuff on it, the floating shelf will be level.
If you notice that the shelf is fully loaded and angled downwards towards you and away from the wall, remove the shelf and very gently bend your bolts upwards.
You can do this multiple times to the bolts without it affecting their structural integrity in any way. If the shelf isn’t dropping down fully to level, it may slowly settle over the next few weeks, but if it’s drastic, you can very slightly bend the bolts down and reinstall the shelf.
Final thoughts on DIY floating shelves
I hope you enjoyed this tutorial on DIY floating wall shelves. With just a few hours, and some patience you can successfully hang floating shelves using beautiful, high quality lumber.
Don’t forget about asking any questions you might have about floating shelves in the comments below!
Other DIY articles you might like:
Inexpensive wall decor ideas


