How to paint furniture the right way: Lessons from a pro
Rather than just run out and buy something to fit your current preferences, why not learn how to paint furniture?
Many heirloom pieces of furniture that are out of date can be brought up to the latest trends with just a few coats of paint, and no, you don’t have to be a professional to paint furniture.
So if you’ve got an old dresser that’s way too boring, consider breaking out the paint brush and giving it a facelift with my step-by-step guide on painting furniture.
What kind of paint should I use on wood furniture?
For stained wood that you’re planning to paint, you’ll want to first prime all surfaces with an oil-based primer because most finishes on stained furniture are oil-based.
After you’ve primed the furniture, you then can use an oil or latex-based paint.
Is there a way to paint furniture without sanding?
Unfortunately, there isn’t a way to correctly paint furniture without sanding. For the best adhesion of any new paint product intended to cover stained or clear coated furniture, sanding is an essential prerequisite.
If you do paint without first sanding, your paint will not adhere to the surface as well and will eventually peel or chip more easily.
What’s the best brand of paint for furniture?
I recommend Kilz primer to prime your furniture and Benjamin Moore paint for the smoothest finish possible. Home Depot’s new Urethane Alkyd paint is also an extremely good paint to use for that ultra smooth finish.
Supplies you’ll need to paint furniture:
- 80 grit sandpaper
- 120 grit sandpaper
- 2 ½ angled brush
- Drop cloth
- Primer
- Supplies to clean furniture
- Paint color of your choice
How to paint furniture in 6 simple steps
Step #1: sand
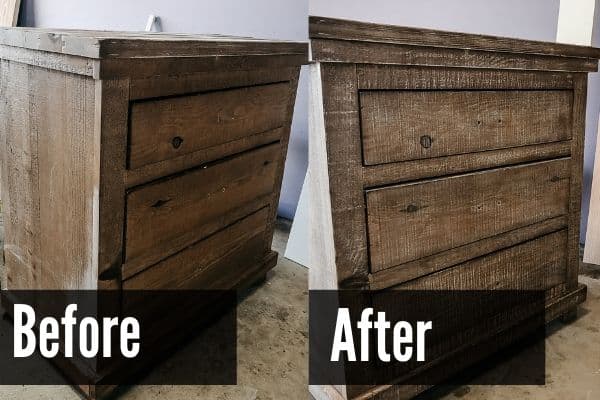
Sanding furniture before paint is very important. Move your piece of furniture outdoors to sand, as sanding properly will produce a ton of dust.
To begin, choose the 80 grit sandpaper and sand the entire piece down in order to aggressively scuff the finish.
After you’ve done that, use the 120 grit sandpaper to provide a smoother surface before applying paint.
The most important pieces of information for this step are to remember to sand in the direction of the grain and to put enough force into your motions so that you sand the piece down enough.
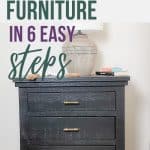
Take a look at the piece below to get a good idea of how much sanding was involved.
Step 2: clean furniture
Now that you’ve sanded the piece of furniture down, you’ll want to clean it.
First, I like to take a paint brush and dust off the dust. Then I follow up with a damp cloth and make sure all surfaces are free of any dust or dirt.
The purpose of this step is to eliminate all dust from the furniture. If dust is left behind it will not only compromise your paint quality but it will also create microscopic air pockets between the paint and your furniture that will eventually cause bubbling and peeling of the paint.
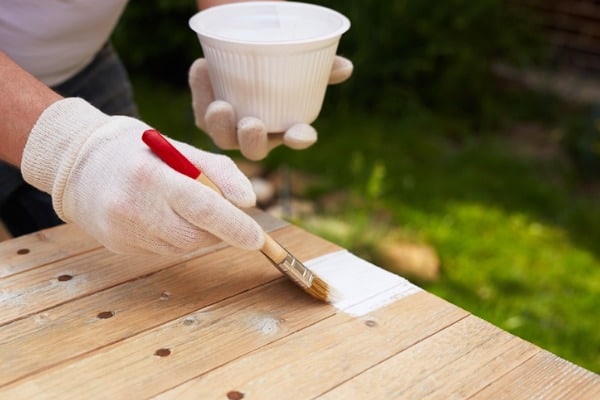
Step 3: prime
Once the furniture is completely dry after using the damp cloth, you can then begin priming.
I recommend using an oil-based primer like Kilz Original for this step. Primer is formulated to provide maximum adhesion to the surfaces it touches, and this strong adhesion creates a reliable surface for your finish paint. Don’t skip the primer!
Step 4: Determine if you need to sand again
In most cases, you’ll need to very lightly sand with your 120-grit sand paper after your primer has dried. The primer will cause little “hairs” in the wood to stand up which makes for a rough texture.
You’ll be able to feel the difference in areas that you re-sand vs. those you haven’t yet. As in step 2, you’ll need to clean the piece again, but you’ll have very little dust this time.
Step 5: Apply your first coat of finish paint
You’re going to see a lot of other furniture painting tutorials that will instruct you to use a roller. This may be a little faster than using a paint brush, but the finish it leaves behind will be textured like your walls – it won’t feel like a quality piece of furniture anymore.
Besides the texture issue, there’s actually a bigger reason not to use a roller on wood: a roller moves quickly over the surface with a great deal more paint than a brush can hold, but in the process will trap small air bubbles underneath it.
The process of moving back and forth multiple times in opposite directions with a paint brush eliminates these air bubbles. The individual bristles of your brush are able to conform to the tiny irregularities of the wood and force paint deeper into the surface than a roller can.
If you are just determined to do this project quickly with a roller, at least go back over the surface with your brush several times to get rid of the air bubbles.
Even if you’ve never painted before with a paint brush, trust me, you’ll get the hang of it.
Just like when you sanded, you want to paint in the direction of the grain; doing so will highlight the character of the wood and allow its grain to stand out in a much better looking way than having random brush strokes interrupting the grain in perpendicular directions.
Step 6: Apply second coat of paint
It’s now time to add your second coat of paint. For most paint projects, this will be your last coat of paint, so take care to make sure you completely cover every surface and that you are painting with the grain again.
There’s a reason you’ll want to do a second coat of finish paint, and it has to do with the sheen of your final product.
Suppose you finish painted the furniture in a satin sheen. This first finish coat actually gets absorbed slightly into the primer coat beneath it, and so does some of its sheen.
The second coat not only provides another layer of protection, but also fully delivers your sheen. If you applied a second coat to one small spot and let it dry, you would notice that the second coat actually reflected light differently than the first coat next to it.
By applying this second coat, you guarantee a far more uniform finish. Just do the second coat. You’ve come this far. Go for gold!
Closing thoughts on how to paint furniture
Remember to wait 24 hours before moving your furniture or putting the drawers back after painting. Additionally, wait at least 7 days to put heavy items on your furniture as it takes that long to full cure!