How to remove shower caulking
Got Mold under your shower caulking or just ready to replace your worn down caulk? In today’s post, we’ll walk you through the process of how to remove shower caulking, step-by-step.
Whether you’re replacing your caulk from age or because of mold growth underneath, there’s nothing more disgusting than dirty caulk.
Warm and moist environments are feeding grounds for the mold and other bacteria, and it can be nearly impossible to eradicate if it’s found its way underneath the silicone that seals your shower.
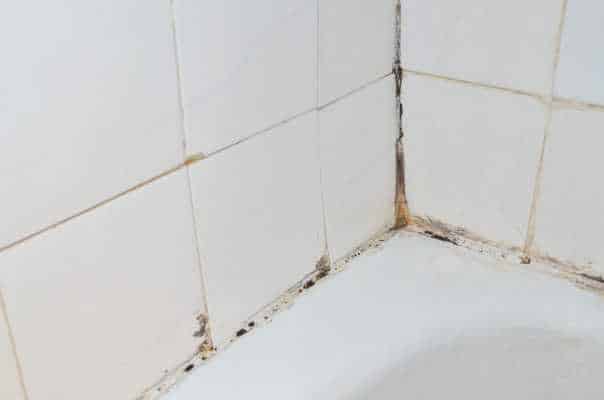
Want it gone? I’ll show you how to go from this:

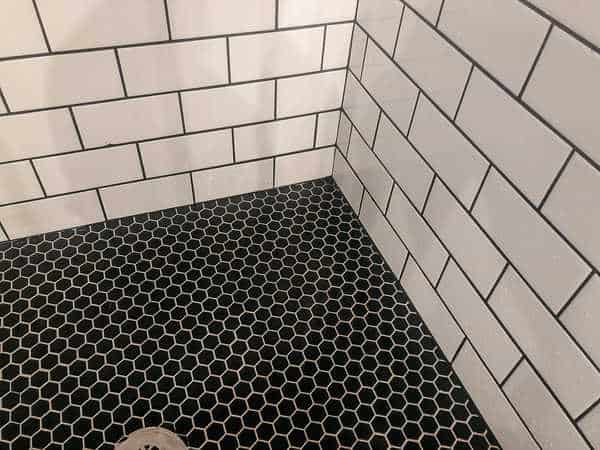
to this:

How to remove shower caulking
With just a few simple tools and under an hour, you can easily upgrade your worn out or mold caulk.
Step 1: Use a razor blade to cut the caulk
You’ll need a single edge square razor blade to start with.
Because silicone can be very dense and difficult to move once fully cured, only the sharpest and thinnest blade can separate the silicone from the surface to which it has adhered.
Start at the edges of the silicone and slide the razor as parallel to the glass surface as possible.

This allows for a deep cut with the corner of the blade while also separating it from the glass.
Once you’ve done this along all glass edges, do the same thing with the tile, ensuring that your blade is as flat against the tile surface as possible.

You may need to do this several times to get the blade to fully sink down into the corner from both directions.
Step 2: Remove the silicone
Use a putty knife or sharp chisel to gently scrape out an end of the silicone so that you can then pull it out of the corner by hand.
You may need to use the razor blade with one hand while you will it out slowly with the other.
The deeper your initial razor blade cuts, the more easily the silicone will pull out. Take your time and try not to pull the silicone too hard without cutting it loose along the way with the razor blade.
Step 3: Prepare your surface
Once you’ve removed the major runs of the silicone from all of your corners, you’ll likely have little pieces of silicone that were left behind and are still stuck to the glass or tile.
Take your razor blade and gently scrape up each one. This may seem like the most tedious task of your life, but the cleaner you get get the surface of any debris, the better adhesion and seal you’ll get from the new silicone you apply after cleaning.
Dust out all of the remaining dust and loose silicone pieces out of the corners. I like to use a fine bristle paintbrush for most tight space dusting.
A vacuum cleaner is always a good option, but the sticky nature of silicone may require some physical sweeping to fully get it out. Remember, the cleaner the surface, the better the adhesion.
Step 4: Clean the area
Mix a 50/50 bleach/water solution in a spray bottle and thoroughly soak the exposed corners. Wait about 15 minutes and do this again.
Let the bleach sit for about 10 minutes after this and then fully rinse the corners out with clean water.
Step 5: Wait 24-48 hours
Wait at least 24 hours before attempting to apply silicone. The corners must be completely dry, even though many silicones can be applied in moist settings.
The issue here is not the silicone adhesion, it’s the potential for trapped moisture. Mold loves a warm, moist and enclosed environment.
I ended up waiting over 48 hrs to be safe, because I really didn’t feel like doing this again anytime soon, as fun and exciting as it was.
Step 6. Apply the Silicone
Open the nearest window for ventilation and open the silicone tube. Every silicone tube is packaged differently – some have a cap you have to unscrew before you can cut the tip off while others are just the tip.

Make sure you cut this tip at an angle with a utility knife rather than using the caulking gun’s clipper function.
These clippers are literally a last resort – like, you’re stuck on an island with no knife, but you have to caulk something to get off the island.
That might be the only time you should use the clippers. They are not sharp and they smash the tube making a cleanly applied bead of silicone impossible.
Almost all silicone tubes will have a seal that needs to be broken once you’ve cut the tip open. Your caulking gun should have a long metal spike that can be shoved down into the tube to penetrate this seal.
Stab the seal multiple times in multiple locations by slightly changing the angle of the metal spike as it goes down into the tube each time.
Apply the silicone along your corners, one linear run at a time. After you’ve applied it using the gun, run your index finger (with smooth gloves on if you don’t want silicone on your skin) along the bead slowly and consistently to smooth it out and to create a concave impression in the bead.
Do this on all corners, making sure that your quantity is not too little to fully fill the gap and make contact with both surfaces, but also not so much that it pours out around your finger and makes a secondary bead or bubble out wide.
Step 7. Wait
Wait at least 24 hrs before using the shower.
Find even more tips on how to remove mold from shower caulking here.