How to remove mold from shower caulking
It’s not uncommon to locate mold in your shower; after all, any area that’s repeatedly exposed to moisture is likely going to produce mold at some point.
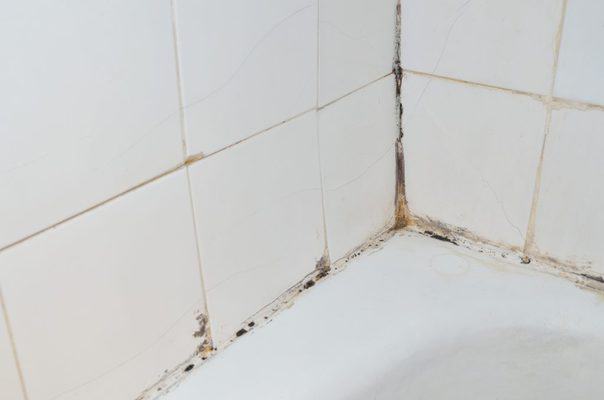
If you’ve noticed black or pink mold on the silicone caulking in your shower, we’ve written an in-depth guide on how to remove mold from shower caulking, plus tips to keep the mold at bay.
How do you remove mold from shower caulking?
Depending on how widespread your mold infestation is, there’s a fairy simple remedy to eradicating the problem.
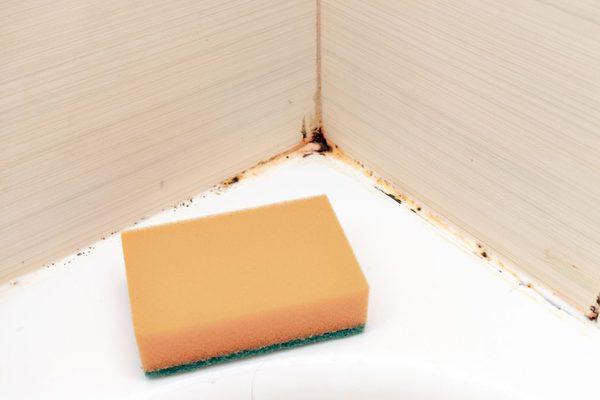
Step #1 Gather supplies–You’ll need bleach, a mask, gloves, toilet paper and vinegar for this process.
Step 2: Start by first venting the area by opening up a nearby window and put on a mask and gloves. Then you want to take bleach and pour it directly onto the mold on the caulk.
Next take toilet paper, or cotton balls depending on how large the area of mold is, and place directly on the caulk. If you’re using toilet paper, you want to roll up the toilet paper into a thin snake basically and set it on the caulk. Using toilet paper or cotton balls keeps the bleach where it needs to be and won’t allow it to evaporate.
Step 3: let this sit for 12 hours or overnight. Since bleach is so strong, I’d do this first thing in the morning, that way you can allow the windows to stay open all day, ventilating the space.
Step 4: Remove the toilet paper or cotton balls. You should find that the mold has vanished.
If you only had a minor mold problem to begin with, you can stop here. However, if your mold issue was fairly large, continue on to the next steps.
Step 5: Use vinegar to finish the job. While bleach does a great job at getting rid of surface mold, it really doesn’t do well at permeating surfaces and killing the mold completely. Even if you only had small amounts of mold on your silicone, I would strongly recommend following this step, or you could be cleaning mold again in a couple short months.
Put vinegar in a spray bottle and spray area affected with mold.
Let sit for a couple of hours. Then rinse with warm water.
That should eradicate the mold issue completely. If your caulk is pretty old, or you notice mold creeping back in even after you’ve cleaned with bleach and vinegar, it’s time to take more drastic measures and following steps 6-8.
Step 6: Get to the root of the mold. Sometimes the mold is not on the surface of your caulk, but rather underneath and likely behind some tiles, too. To truly remove the mold for good, you’re going to have to remove caulk and affected tiles.
If caulk doesn’t come off easily, apply caulk remover to allow caulk to loosen from tub and tiles. Use a utility knife to remove the caulk once it’s softened.
Look for excess mold/mildew behind tiles by removing them using a hammer and chisel. Take care to remove just one at a time. Once you see any mold or mildew, use the vinegar solution to kill mold.
Step 7: Replace tile and recaulk. Replace your tile using a similar grout color. Finish up by re-caulking.
How do I stop mold from growing in my shower?
Now that you’ve cleaned your shower and there isn’t a trace a mold in sight, here’s some simple tips to make sure you keep it that way:
Make sure the area is properly vented
Mold thrives in moisture, so do your best to keep it out by always turning on the vent while you shower. If you don’t have a vent, consider adding one, or at the very least open up your window frequently to let out moisture.
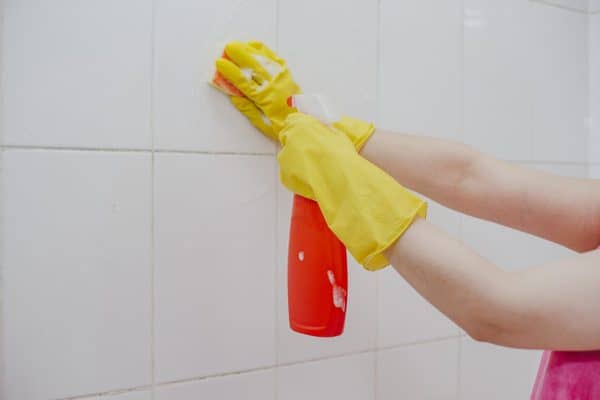
Clean routinely with vinegar
Bleach removes the ugly mold color from surfaces but doesn’t penetrate to the root of the problem like vinegar. I have found since routinely cleaning the shower with vinegar, I no longer see mold growing on my shower caulk.
To make this easy shower cleaner, mix 1 part vinegar with three parts warm water. Alternatively, you can use dawn combined with vinegar too by mixing 1 cup vinegar and 1 cup dawn dish detergent.
Don’t go too long in between cleanings, and aim to clean your shower 3-4 times per month.
Use a squeege to remove excess moisture
Either use a squeege or a cloth to remove moister collecting on caulking after showering. Remember, moisture is the enemy here! Excess moisture causes mold growth.
Assess caulk frequently
Most caulking used in bathrooms has an average lifespan of five years. Beyond replacing caulk once it’s reached the end of its useful life, look for cracks, tears or crumbling of caulk and quickly replace any caulk that shows signs of wear and tear.
Leaving caulk that’s broken down causes moisture to get behind the caulk and ultimately, the tile, causing a huge mold and mildew problem.
Why does mold keep coming back in my shower?
If mold and mildew keeps coming back you need to make sure you’re getting to the root of the problem. It’s very likely that the mold isn’t on top of your shower silicone, but rather beneath it– and in that case you’ll need to remove caulk and possibly certain tiles to really remove the mold for good.
Final thoughts on how to remove mold from shower caulking
Following the steps outlined above will remove mold from shower caulking easily. Remember, if your caulk is in need of repair, cleaning the caulk will just delay the inevitable!